

Brown Butter Brownies with Homemade Marshmallow
Rich, fudgy brown butter brownies topped with a soft, fluffy homemade marshmallow. Because apparently regular brownies weren’t enough.
There is something about a homemade brownie that never gets old. But when you take a rich, fudgy brownie, add the nutty flavor of brown butter, and then cover it with homemade marshmallow… you’ve officially taken brownies to another level.
I wanted these to feel like the kind of dessert you make when you’re craving something extra. Not complicated just for the sake of being complicated, but a little more special than your everyday brownie.
And that homemade marshmallow on top? That’s the part.
It is soft, fluffy, sweet and almost melts into the brownie when you warm the top. Finish it with a quick toast and you get that beautiful golden marshmallow flavor without needing
a campfire.
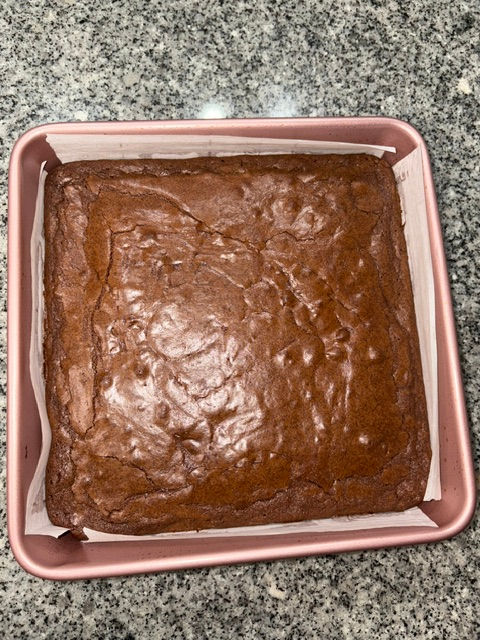
Why You’ll Love These Brownies
They’re deeply chocolatey.
Dutch-process cocoa gives the brownies a rich chocolate flavor.
Brown butter makes them extra special.
Browning the butter cooks the milk solids until they develop that nutty, toasted flavor.
They’re fudgy.
The goal isn’t a cakey brownie. These are rich and fudgy with soft centers.
The marshmallow topping changes everything.
The contrast between the dense chocolate brownie and light, fluffy marshmallow is what makes these so good.
And then you toast the marshmallow.
That golden top is the finishing touch.
Ingredients
Brown Butter Brownies
170 g (¾ cup) unsalted butter
65 g (¾ cup) Dutch-process cocoa powder
4 g (1 tsp) vanilla extract
350 g (1¾ cups) packed light brown sugar
3 large eggs
94 g (¾ cup) all-purpose flour
3 g (½ tsp) salt
112 g (½ cup) semisweet or bittersweet chocolate chips, optional
Homemade Marshmallow
80 g (⅓ cup) water
14 g (2 packets) unflavored gelatin
3 g (½ tsp) fine sea salt
1 vanilla bean, scraped
Sugar Mixture
80 g (⅓ cup) water
200 g (1 cup) granulated sugar
90 g (about ¼ cup) honey or light corn syrup
The marshmallow method involves cooking the sugar mixture to 250°F, then whipping it with the bloomed gelatin until thick and fluffy.
How to Make the Brownies
1. Prepare your pan
Preheat your oven to 350°F.
Grease an 8×8-inch square pan and line it with parchment paper, leaving enough overhang to easily lift the brownies out later.
2. Brown the butter
Add the butter to a saucepan over medium-low heat.
Let it melt, stirring and scraping the bottom of the pan frequently. The butter will foam as it cooks. Continue cooking until you see golden-brown milk solids and the butter smells nutty and toasted.
Watch it closely here. Brown butter can go from perfectly golden to burnt very quickly.
Remove it from the heat immediately once it’s browned. This is the step that gives these brownies that deeper flavor.
3. Bloom the cocoa
Whisk the cocoa powder and vanilla into the hot brown butter until smooth and there are no lumps.
This helps intensify the chocolate flavor.
4. Whip the eggs and sugar
In a stand mixer, beat the eggs and brown sugar until the mixture becomes lighter, fluffy and pale.
5. Combine
Fold the brown butter mixture into the egg and sugar mixture.
Add the flour and salt and gently fold until you no longer see streaks of flour.
If you’re using chocolate chips, fold those in last.
6. Bake
Spread the batter evenly into your prepared pan.
Bake for approximately 25–30 minutes, but start checking around 20 minutes.
You want the edges to be set while the center still has a little softness. The brownies will continue cooking as they cool, so don’t wait until the center looks completely dry.
Let the brownies cool completely.
How to Make Homemade Marshmallow
This is the part that sounds intimidating but is actually so fun to watch come together.
1. Bloom the gelatin
Add:
80 g water
14 g gelatin
salt
scraped vanilla bean
to the bowl of your stand mixer.
Let the gelatin mixture sit and bloom.
2. Make the sugar syrup
Add the remaining water, sugar and honey or corn syrup to a deep saucepan.
Attach a candy thermometer and cook over medium heat until the mixture reaches 250°F.
Be careful—the mixture will bubble significantly as it cooks.
3. Whip the marshmallow
Once the syrup reaches 250°F, turn your mixer on low.
Slowly pour the hot sugar syrup into the gelatin mixture.
Once incorporated, increase the mixer to medium-high and whip for approximately 10 minutes, or until the mixture becomes thick, fluffy and pulls away from the whisk.
4. Add the marshmallow to the brownies
Spread the marshmallow evenly over the completely cooled brownies.
Cover and refrigerate for approximately 2–4 hours, or until the marshmallow has firmed up enough to slice.
The Best Part: Toasting the Marshmallow
Once your brownies are sliced, place them on a baking sheet.
Toast the marshmallow topping under the broiler for about 1–2 minutes, watching it closely the entire time.
You want that beautiful golden-brown color without burning the marshmallow.
Do not walk away from the broiler. It happens FAST.
And honestly? If you have a kitchen torch, this is also the perfect time to use it.
HERRtruthBakes Tips
Don’t overbake the brownies.
This is probably the biggest tip. If you want fudgy brownies, pull them from the oven while the center still looks slightly underdone.
Brown the butter slowly.
Low and steady gives you more control and helps prevent burning.
Let the brownies cool completely.
Don’t rush the marshmallow step. You want a completely cooled brownie before adding the marshmallow layer.
Use a sharp, lightly oiled knife.
The marshmallow can be sticky, so lightly oiling your knife will make slicing much easier.
Toast right before serving.
The toasted marshmallow is at its best when it’s warm and freshly browned.
How to Store Them
Store the brownies in an airtight container.
If you’re keeping them for several days, refrigeration can help extend their freshness. If you plan to toast individual pieces, I’d recommend waiting to toast them until right before serving.
Frequently Asked Questions
Can I make these without the marshmallow?
Absolutely! You’ll still have a delicious brown butter brownie.
But let’s be honest—the marshmallow is what makes these special.
Can I use marshmallow fluff instead?
You can experiment with marshmallow fluff, but homemade marshmallow gives you a different texture and makes the recipe feel extra special.
Can I use corn syrup instead of honey?
Yes. The marshmallow recipe allows for either honey or corn syrup.
Do I have to toast the marshmallow?
No, but I highly recommend it. That lightly toasted top adds another layer of flavor and makes the brownies look amazing.
Recipe Card
Brown Butter Brownies with Homemade Marshmallow
Prep: 30 minutes
Bake: 25–30 minutes
Marshmallow: 15 minutes + chilling
Yield: 9 brownies
Pan: 8×8-inch
Brownies
170 g (¾ cup) unsalted butter65 g (¾ cup) Dutch-process cocoa powder4 g (1 tsp) vanilla extract350 g (1¾ cups) packed light brown sugar3 large eggs94 g (¾ cup) all-purpose flour3 g (½ tsp) salt112 g (½ cup) semisweet or bittersweet chocolate, optional
Marshmallow
80 g (⅓ cup) water14 g (2 packets) unflavored gelatin3 g (½ tsp) fine sea salt1 vanilla bean80 g (⅓ cup) water200 g (1 cup) granulated sugar90 g (¼ cup) honey or corn syrup
A Little HERRtruthBakes Note
If you make these, I want to see them! Tag @herrtruthbakes so I can see your brownies.
Because baking is always better when you share it.


Comments